

How to Fix Windows 10 Blue Screen Errors and Identify Their Causes
By Eva Elekcha · November 13, 2026
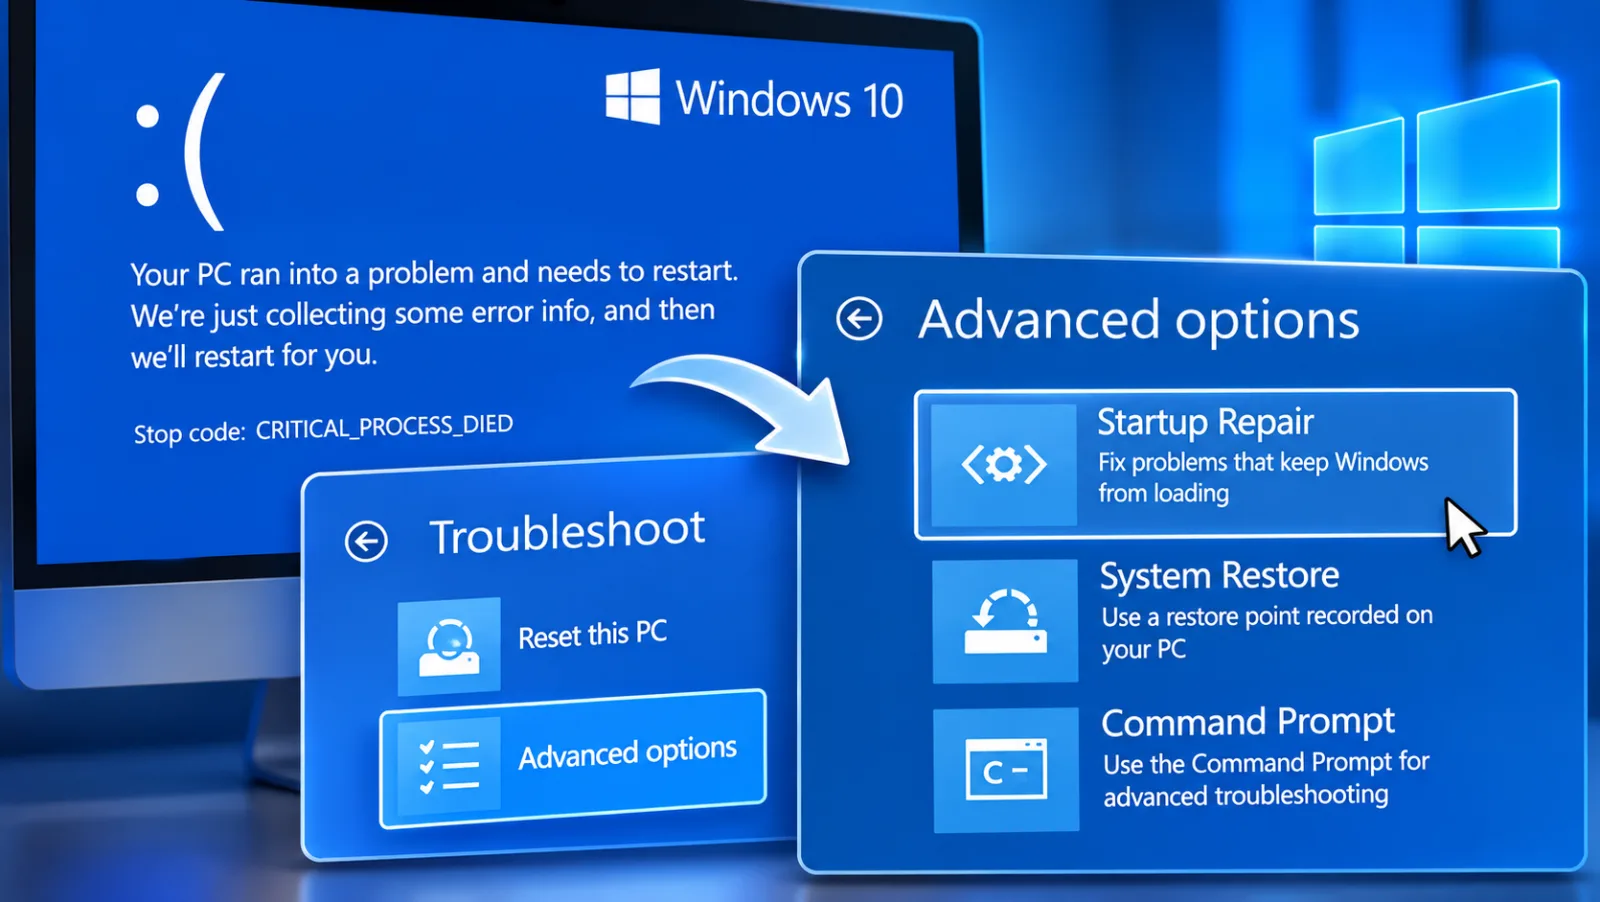
Table of contents
A Windows 10 blue screen signals that the operating system has encountered a critical error and cannot continue safely.
The system stops, records diagnostic information when crash dump settings permit, and usually restarts automatically.
The cause can be a faulty driver, defective memory, storage problems, damaged Windows files, incompatible software or failing hardware.
The most reliable fix starts with the stop code and the changes made shortly before the first crash.
Microsoft calls this a stop error or bug check.
The message may include a code such as MEMORY_MANAGEMENT, PAGE_FAULT_IN_NONPAGED_AREA or DRIVER_IRQL_NOT_LESS_OR_EQUAL, and sometimes identifies a driver file involved in the failure.
These details help narrow the investigation, but a stop code is not a complete diagnosis.
The same code can arise from different underlying faults, so repeated crashes need to be examined as a pattern.
Windows 10 reached the end of standard support on October 14, 2025.
Existing installations continue to run, but ordinary Home and Pro editions no longer receive regular security updates or technical support from Microsoft unless covered by an applicable Extended Security Updates arrangement.
This matters when troubleshooting older computers because a persistent crash may involve hardware or software that no longer receives a supported fix.
Read the stop code
The stop code is the first piece of evidence to preserve.
When the blue screen appears, write down the exact wording, any hexadecimal code, the percentage of diagnostic information collected and any driver filename displayed beneath the main message.
If the computer restarts too quickly, open the Windows Startup and Recovery settings after it boots and temporarily clear Automatically restart under System failure.
This gives you time to record the next error rather than relying on memory.
A code such as CRITICAL_PROCESS_DIED points to a critical Windows process that stopped, while MEMORY_MANAGEMENT indicates a problem associated with memory management.
DRIVER_IRQL_NOT_LESS_OR_EQUAL often directs attention towards a kernel driver that accessed memory incorrectly.
These names identify the category of failure, not necessarily the defective component.
Microsoft maintains a bug check reference for the technical meaning of individual codes, and its guidance recommends examining the associated logs and hardware changes before selecting a remedy.
The timing of the crash adds useful context.
A blue screen that begins immediately after a graphics driver update deserves a different investigation from one that occurs during startup after a new SSD has been installed.
Record whether the error appears during boot, when connecting a peripheral, during gaming, while copying large files or after the computer has been idle.
If the stop code changes on every crash, do not assume that each new code represents a separate fault; unstable memory or another underlying hardware problem can produce inconsistent symptoms.
Remove recent changes
Disconnect recently added hardware before attempting deeper repairs.
Shut down the computer and remove external devices that are not essential to startup, such as USB storage, docks, printers, external network adapters and capture devices.
Keep the keyboard, mouse and display connected, then start Windows and check whether the problem returns.
Microsoft recommends removing newly added hardware as an early troubleshooting step because an incompatible device or its driver can trigger a stop error.

Avast Antivirus
Our Avast Antivirus review tests malware protection, real world performance, and pricing. See if this security suite with its excellent free plan is right for …
- Excellent independent lab test scores
- Strong free version available
- Frequent upgrade prompts in free
- VPN is not the fastest
If the computer becomes stable after a device is removed, reconnect peripherals one at a time and test after each connection.
This controlled process can identify a particular device, cable, port or driver that triggers the crash.
A USB device that works on another computer may still have a compatibility problem with a particular Windows installation or controller.
Check the manufacturer's support page for the exact model and Windows 10 driver before reconnecting it permanently.
Software changes deserve the same attention.
Uninstall an application, security tool, hardware monitoring utility or system customization program if the crashes began immediately after its installation.
Use Settings, Apps, Apps & features to remove ordinary applications, and follow the vendor's removal instructions for security software that installs low level drivers.
Avoid removing several applications at once, because doing so makes it harder to identify which change affected system stability.
Start Windows in Safe Mode
Safe Mode loads Windows with a limited set of drivers and services, which helps determine whether a third party component is involved.
If the computer works reliably in this mode but crashes during a normal startup, a driver, startup application or service becomes a stronger suspect.
Safe Mode does not prove that the hardware is healthy, but it reduces the number of components active during the test.
Microsoft recommends using it when repeated stop errors prevent normal troubleshooting.
If Windows reaches the desktop, hold Shift while selecting Restart from the Start menu.
On the recovery screen, choose Troubleshoot, Advanced options, Startup Settings and Restart.
When the Startup Settings menu appears, press 4 or F4 for Safe Mode, or 5 or F5 for Safe Mode with Networking.
The networking option loads additional components and should be used only when internet access is needed to obtain a driver or support information.
If Windows cannot reach the desktop, allow the system to enter Windows Recovery Environment after repeated failed starts, or boot from Windows installation media and select the repair option.
From the recovery menus, open Troubleshoot, Advanced options and Startup Settings.
If BitLocker device encryption is enabled, Windows may request the recovery key before it permits access to certain recovery operations.
Keep that key available before making changes to an encrypted system drive.
Once Safe Mode loads, review recently installed drivers and applications.
Open Device Manager and look for devices with warning symbols, then inspect their properties and driver details.
If a device or driver was updated shortly before the first crash, use the Roll Back Driver option where available.
If the issue disappears after removing or disabling a specific component, obtain a compatible replacement from the computer or hardware manufacturer rather than installing a generic package from an unfamiliar download site.
Reverse driver updates
A driver update can cause a stop error when the new package is incompatible, corrupted or affected by a defect.
This is especially relevant for graphics, storage, chipset, network and security drivers because they operate close to the Windows kernel.
If the first crash followed a driver installation, open Device Manager, expand the relevant hardware category and select Properties for the affected device.
On the Driver tab, choose Roll Back Driver if Windows makes the option available.
A rollback restores the previous driver package retained by Windows.
The option may be unavailable if the previous package has been removed or the device was installed without an earlier version.
In that case, download a supported driver from the computer manufacturer's page for the exact model, or from the component manufacturer's official site where appropriate.
Check the release notes and supported Windows version before installing it, and restart the computer after the installation completes.
A graphics driver can be particularly difficult to diagnose because a crash may occur only when an application uses hardware acceleration.
If the stop code includes VIDEO_TDR_FAILURE or a graphics driver filename, check the graphics manufacturer's release notes and the computer maker's recommended package.
Laptop vendors sometimes customize graphics switching, power management and display behavior, so a generic driver is not always the best first replacement.
Avoid installing multiple driver packages in succession without testing between them.
Repair Windows files
Damaged system files can cause repeated crashes even when the hardware and drivers appear normal.
Windows includes Deployment Image Servicing and Management, known as DISM, and System File Checker, known as SFC, to inspect and repair parts of the operating system.
Run these tools from an elevated Command Prompt while Windows is stable enough to reach the desktop.
Open Start, type Command Prompt, right click the result and select Run as administrator.
Run DISM first with the RestoreHealth option for the online Windows image.
Allow the operation to complete, because it may take several minutes and can appear to pause during the repair process.
Then run SFC with the Scannow option to check protected Windows system files and replace damaged copies where possible.
Microsoft documents these utilities as part of Windows repair procedures, and the order matters because SFC can use the repaired component store as its source.
If SFC reports that it found and repaired corrupted files, restart Windows and check whether the same blue screen returns.
If it reports that it could not repair some files, review the CBS log for additional detail or repeat the DISM and SFC process after confirming that Windows Update components and the system drive are functioning.
These commands repair Windows components; they do not fix defective RAM, a failing SSD or an incompatible third party driver.
Treat a clean result as one diagnostic finding rather than proof that every component is healthy.
Test memory and storage
Unstable RAM can produce several different stop codes because corrupted data may affect unrelated parts of Windows.
MEMORY_MANAGEMENT and PAGE_FAULT_IN_NONPAGED_AREA can be associated with memory problems, although neither code proves that a memory module is defective.
Run Windows Memory Diagnostic by searching for Windows Memory Diagnostic from Start, selecting the restart and check option, and allowing the test to complete.
Avast Antivirus
Our Avast Antivirus review tests malware protection, real world performance, and pricing. See if this security suite with its excellent free plan is right for …
- Excellent independent lab test scores
- Strong free version available
- Frequent upgrade prompts in free
- VPN is not the fastest
If the test reports errors, repeat the test where practical and consider testing individual memory modules or using the computer manufacturer's hardware diagnostics.
A computer with multiple RAM modules may become stable after one faulty module is removed, but testing requires care.
Shut down the machine, disconnect power and follow the manufacturer's service instructions before opening the case.
Laptop memory may be soldered or difficult to access, and opening a device can affect warranty coverage.
If you are not familiar with handling internal components, use a qualified technician rather than removing modules while the computer is powered.
Storage faults can also cause system crashes, especially when Windows cannot reliably read operating system files or access the system volume.
Check the drive's health with the computer or SSD manufacturer's diagnostic utility, and review Windows logs for disk, controller or file system errors near the time of the crash.
Keep important files backed up before running repairs on a drive that may be failing.
A drive that makes unusual mechanical noises, disappears intermittently or reports critical health warnings should be treated as a hardware risk, not merely a Windows software problem.
Microsoft recommends maintaining sufficient free disk space for swap files and other operating system operations.
Its stop error guidance suggests keeping approximately 10 to 15 percent of the system drive free, although the exact requirement varies with configuration.
Remove temporary files and unnecessary downloads only after preserving personal data and crash dumps that may be needed for diagnosis.
If the system drive is nearly full, Windows may struggle to complete updates, write diagnostic files or perform normal maintenance.
Inspect crash dumps
Windows can save a crash dump when a stop error occurs, giving you evidence that is more useful than the blue screen message alone.
A small memory dump is normally stored in the Windows Minidump folder, while larger kernel or automatic dumps are typically saved as MEMORY.DMP in the Windows directory.
These files capture information about the system at the moment of failure, including the stop code, loaded drivers and parts of the execution context.
They can help distinguish a recurring driver problem from a broader hardware or operating system fault.
To check whether Windows is configured to create these files, search for View advanced system settings and open the Advanced tab.
Under Startup and Recovery, select Settings and inspect the Write debugging information option.
Small memory dump or Automatic memory dump can be suitable for routine troubleshooting, provided the system drive has enough free space and the page file is configured appropriately.
The small dump location is normally the Minidump folder under the Windows directory.
For a basic review, NirSoft's BlueScreenView can scan saved minidump files and display crash dates, bug check codes and drivers that appeared in the crash stack.
The developer warns that its suspected driver identification is not completely accurate, so treat the result as a lead rather than a final diagnosis.
A driver listed in a dump may have been active when another component failed.
Compare several crash records and look for the same driver or module appearing repeatedly before deciding what to replace.
For deeper analysis, Microsoft's WinDbg can open crash dump files and run the analysis command documented as bang analyze dash v.
The output includes the bug check details and information about the thread and module involved in the crash.
Microsoft notes that effective dump analysis can require familiarity with Windows internals, debugging symbols and driver behavior.
If the analysis repeatedly identifies the same third party driver, check its vendor's support notes and test a supported update or rollback.
If the suspected module changes across crashes, investigate memory and storage before assuming that several unrelated drivers have failed.
A further diagnostic trap is the absence of dump files.
A missing file does not mean the blue screen did not occur; Windows may not be configured to save one, the system may lack the required page file, or a storage problem may prevent the dump from being written.
Some cleanup utilities also remove crash data, which can erase evidence before an investigation.
Avoid deleting temporary system files or running aggressive cleanup tools while the crashes are under investigation.
Check firmware and cooling
Firmware and BIOS updates can resolve compatibility problems involving processors, memory, storage controllers and other motherboard components.
Microsoft includes outdated BIOS or firmware among the areas to investigate when diagnosing stop errors.
Check the computer manufacturer's support page for the exact model and read the release notes before applying an update.
A BIOS update carries more risk than an ordinary application update, so use a reliable power supply, follow the manufacturer's procedure and never interrupt the process.
Overheating and unstable power can also cause repeated crashes.
Check whether the computer becomes unusually hot, whether its fans operate correctly and whether ventilation openings are obstructed by dust.
On a desktop, an unstable power supply or poorly seated component can cause failures under load.
Stop using a computer that repeatedly shuts down because of excessive heat, burning smells or signs of electrical damage, and arrange a hardware inspection before further testing.
If the system uses overclocking or memory profiles that change the hardware's normal operating settings, return the processor, graphics card and memory to manufacturer supported defaults during diagnosis.
An unstable overclock can cause memory corruption or crashes that resemble driver failures.
Change one setting at a time and avoid increasing voltage or applying aggressive performance profiles as a troubleshooting shortcut.
Restore a stable system
System Restore can reverse certain recent system changes when a suitable restore point exists.
Search Windows for Create a restore point, open System Protection and select System Restore.
Avast Antivirus
Our Avast Antivirus review tests malware protection, real world performance, and pricing. See if this security suite with its excellent free plan is right for …
- Excellent independent lab test scores
- Strong free version available
- Frequent upgrade prompts in free
- VPN is not the fastest
Choose a restore point dated before the first blue screen, review the affected programs and drivers, then follow the prompts.
Personal documents are not normally the target of System Restore, but you should still back up important files before recovery operations.
If Windows cannot start normally, access Windows Recovery Environment and select Troubleshoot, Advanced options and System Restore.
You may need an administrator account and, on encrypted systems, a BitLocker recovery key.
System Restore is useful when a recent driver, application or configuration change caused instability, but it cannot repair defective physical hardware.
If the same crash returns after restoration, continue with hardware diagnostics rather than repeatedly restoring the same system.
Startup Repair is intended for problems that prevent Windows from starting, rather than every blue screen that occurs after login.
It can examine certain startup problems and attempt repairs, but it will not identify every faulty driver or hardware component.
If the stop error appears during boot, try Startup Repair from the Advanced options menu before considering a full Windows reset.
Keep in mind that a reset or reinstall can remove applications and data, depending on the option selected.
A clean installation should be a last resort after backups and hardware checks.
Reinstalling Windows can remove damaged operating system files and software conflicts, but it will not fix faulty RAM, a failing SSD, overheating or an unstable power supply.
If a clean installation still produces stop errors before additional applications are installed, hardware or firmware becomes a stronger suspect.
Preserve the crash codes and diagnostic reports so a technician can continue the investigation without repeating every earlier step.
Frequently Asked Questions
Why does Windows 10 keep showing different blue screen codes?
Can a blue screen damage my files?
What if Windows 10 crashes before I can log in?
Is the blue screen always caused by faulty RAM?
Should I reinstall Windows 10 after repeated BSODs?
Sources5
- NirSoft on reading blue screen dump files
- BleepingComputer on diagnosing recurring BSODs
- HP Tech Takes on preventing blue screen errors
- Tom's Hardware on fixing Windows blue screens
- Microsoft Learn on advanced stop error troubleshooting
External pages are independent third-party sources. Desking App does not control or endorse their content and accepts no responsibility for it. Visiting them is at your own responsibility and risk.