

How to Download Windows 11 for Free on Laptops, PCs and Macs
By Dr. Isabella Gunn · November 18, 2026
Table of contents
- How to download Windows 11 for free on any device
- 1. Understand the free download
- 2. Check your laptop first
- 3. how to download windows 11 for free in laptop
- 4. how to download windows 11 for free on pc
- 5. how to download windows 11 for free on usb
- 6. how to download windows 11 for free in pendrive
- 7. how to download windows 11 for free with product key
- 8. how to download windows 11 for free on mac
- 9. how to download windows 11 for free without usb
- 10. how to download deep freeze for windows 11
- 11. how to download windows 11 pro for free
- 12. Fix common download problems
- 13. Protect the installation
- 14. Prepare for a clean installation
- 15. What to do after installation
- Frequently Asked Questions
How to download Windows 11 for free on any device
Windows 11 installation files are available directly from Microsoft at no charge.
You can download an ISO image, use the Media Creation Tool to prepare installation media, or run the Installation Assistant on an eligible computer.
The download itself does not provide a new Windows license.
Activation depends on whether the device already has a valid digital license or product key for the edition you install.
The right method depends on the device and the job.
A laptop that already runs Windows can usually use the Installation Assistant or an ISO file.
A new desktop PC without an operating system needs bootable installation media or another supported installation route.
A Mac requires a different approach because its processor architecture determines which version of Windows can run.
The instructions below cover those situations, as well as USB installation, product keys, Windows 11 Pro, and Deep Freeze.
1. Understand the free download
A Windows 11 download is the installation package used to install or reinstall the operating system.
Microsoft distributes the installation files, ISO images, and media creation tools without charging a separate download fee.
You can therefore download the official installer even if you have not yet purchased a Windows license.
The license determines whether the installed copy can be activated, which edition you can use, and whether the device has a valid entitlement.
Three terms are often confused in Windows installation discussions:
- Download: Obtaining the Windows 11 installation files from Microsoft's software download service.
- Installation: Copying Windows onto a computer and configuring it so the device can start and run the operating system.
- Activation: Confirming that the installed Windows edition has a valid license or digital entitlement.
These are separate stages.
A computer can download the ISO without a product key, and Windows Setup may allow installation to continue without entering one.
That does not automatically make the installation licensed.
Microsoft explains that activation uses either a digital license or a 25 character product key, depending on how Windows was acquired.
What free really means
The official Windows 11 download is free, but a new license is not automatically included.
If your laptop or desktop already has an eligible Windows 10 or Windows 11 license, you may be able to install the matching Windows 11 edition and activate it online.
A device that has never had a valid Windows license may still accept the installation files, but it will need an appropriate license to activate the operating system.
There are legitimate situations in which you may not need to buy another license.
For example, reinstalling the same Windows edition on hardware that already has a digital license can allow automatic activation after the computer connects to the internet.
A qualifying upgrade from an activated Windows installation may also retain its entitlement.
A new computer without an existing license is a different case, and the free installer should not be mistaken for a free retail license.
Unactivated Windows may allow you to reach the desktop and use many core features, but activation restrictions can apply.
Personalization options may be limited, and Windows may display an activation notice.
The exact behavior can change across releases, so avoid relying on old articles that promise a fixed list of limitations.
For a business computer, an unactivated installation should not be treated as a substitute for proper licensing.
Choose the correct download method
Microsoft's Windows 11 download page provides different routes for different installation jobs.
The Installation Assistant is designed for upgrading the computer currently in use.
The Media Creation Tool prepares installation media, usually a bootable USB drive.
The ISO download provides a disk image that can be mounted, written to a USB drive, or used with a virtual machine.
| Download option | Best use | What it produces |
|---|---|---|
| Installation Assistant | Upgrade an eligible Windows PC | An assisted Windows upgrade |
| Media Creation Tool | Prepare a new installation drive | Bootable USB installation media |
| ISO image | Manual installation, virtual machines, or custom media | A Windows disk image |
| Windows Update | Upgrade through the normal Windows servicing process | An offered Windows feature update |
The distinction matters when the target computer has no operating system.
The Installation Assistant is not designed to prepare a bootable installer for a blank PC.
In that situation, use the Media Creation Tool or download the ISO and create installation media.
Microsoft also separates x64 and Arm64 installation images, so the processor architecture must match the target device.
2. Check your laptop first
A laptop can download Windows 11 even when its hardware is not suitable for installation.
Check compatibility before you start, especially if the device is several years old or was originally supplied with Windows 10.
Windows 11 has specific processor, memory, storage, firmware, and security requirements.
A download that completes successfully does not confirm that the laptop meets those requirements.
The published minimum requirements include a compatible 64 bit processor with at least two cores and a supported clock speed of 1 GHz, 4 GB of RAM, and 64 GB of storage.
The system firmware must support UEFI and Secure Boot, while the device must have TPM 2.0.
The graphics hardware must support DirectX 12 or later with a WDDM 2.0 driver, and the display must meet Microsoft's minimum size and resolution requirements.
These are baseline requirements, not a guarantee that every feature will work well.
Use PC Health Check
Microsoft's PC Health Check application can assess whether a Windows computer meets the Windows 11 requirements.
It is useful because it checks several compatibility conditions together instead of requiring you to inspect every component manually.
If the application reports that the device is not eligible, read the specific reason before changing firmware settings or replacing hardware.
A laptop may fail the check because TPM is disabled in firmware, Secure Boot is unavailable or disabled, the processor is unsupported, or the device lacks sufficient memory or storage.
Some computers have firmware TPM support under names such as Intel Platform Trust Technology or AMD firmware TPM.
The setting name varies by manufacturer and model, so check the laptop's official documentation before making a change.
Do not assume that every compatibility warning can be fixed by enabling one setting.
A laptop with an unsupported processor remains unsupported even if TPM and Secure Boot are enabled.
Likewise, increasing storage capacity does not resolve a processor compatibility issue.
Check the exact reason reported by PC Health Check, then decide whether the device can be upgraded safely.
Check the laptop's Windows edition
Before downloading Windows, identify which edition is currently installed.
Open Settings, select System, and then select About.
The Windows specifications area shows the edition, version, and operating system build.
You can also open Settings, select System, and then Activation to check the activation state.
This information is particularly useful before a reinstall.
If the laptop originally came with Windows 11 Home and has a Home digital license, installing Windows 11 Pro may not activate automatically.
The same issue can occur in reverse when the license and installed edition do not match.
Keep a record of the edition and activation status before you erase the disk or replace the operating system.
Back up your laptop
A Windows upgrade and a clean installation have different consequences for personal data.
An in place upgrade can offer options to preserve personal files and applications, depending on the current operating system and installation path.
A clean installation can remove files, installed applications, settings, and partitions.
The safest approach is to back up important data before either process.
Copy documents, photos, browser exports, work files, and any locally stored application data to a separate drive or trusted cloud storage location.
If the laptop uses BitLocker or device encryption, make sure you can access the recovery key before changing firmware settings or reinstalling Windows.
Keep the backup disconnected during a clean installation where practical, because selecting the wrong drive or partition can destroy data.
3. how to download windows 11 for free in laptop
For a compatible laptop that already runs Windows 10 or Windows 11, the simplest route is usually Microsoft's Installation Assistant or Windows Update.
Both are designed to upgrade an existing installation without requiring you to create a separate bootable USB drive.
The Installation Assistant is especially useful when you want to start the upgrade yourself instead of waiting for Windows Update to offer it.
Before starting, connect the laptop to a reliable power source and use a stable internet connection.
Keep enough free storage available for the download, temporary installation files, and the completed operating system.
Microsoft lists a minimum of 9 GB of free disk space for the Installation Assistant, although the laptop may need additional space for the full upgrade process and temporary files.
Use the Installation Assistant
Follow these steps to upgrade an eligible laptop:
- Open Microsoft's official Windows 11 software download page in a browser.
- Locate the Windows 11 Installation Assistant section and select the download option.
- Save the installation assistant to the laptop.
- Open the downloaded application and allow it to check the device.
- Review the compatibility result and accept the installation terms when prompted.
- Allow the assistant to download the required Windows files.
- Follow the restart instructions and keep the laptop connected to power.
- Wait for Windows Setup to complete and sign in after the final restart.
- Open Settings, select System, and then Activation to confirm the activation status.
The assistant is intended for supported x64 computers.
Microsoft's download page states that this tool does not run on Arm based PCs, so a laptop with an Arm processor needs the appropriate Windows installation route.
It also requires an existing supported Windows installation, which means it is not the right tool for a laptop whose internal drive is blank.
Use Windows Update
Windows Update is a sensible first option when the laptop is already running a supported version of Windows.
Open Settings, select Windows Update, and choose Check for updates.
If Windows 11 is available for the device, review the offer and follow the installation instructions.
The update service can also identify compatibility holds that prevent an upgrade because of a known driver or hardware issue.
An upgrade may not appear immediately on every eligible laptop.
Microsoft can manage the rollout of feature updates and may temporarily hold an update for devices affected by known compatibility problems.
Repeatedly forcing the installation does not resolve the underlying issue.
If Windows Update does not offer the upgrade, check the device manufacturer's driver information and Microsoft's current release health information before using another method.
Upgrade without losing files
An in place upgrade is designed to preserve the existing Windows installation, but the available retention choices depend on the installation path.
When Setup offers the option to keep personal files and apps, review it carefully before continuing.
If the option is unavailable, do not assume that the installer will preserve your applications.
Stop and investigate the reason before proceeding.
The distinction between an upgrade and a clean install is especially important on work laptops.
Applications may contain local databases, VPN profiles, certificates, browser credentials, or configuration files that are not automatically restored from a standard cloud backup.
Record the software and settings that matter before the upgrade, and confirm that you have administrator access after the process finishes.
4. how to download windows 11 for free on pc
A desktop PC can use the same official Windows download options as a laptop, but the best method depends on whether Windows is already installed.
If the PC currently runs an eligible version of Windows, you can use Windows Update, the Installation Assistant, or an ISO based upgrade.
If the PC is new, has a blank drive, or currently runs another operating system, prepare installation media on a separate working computer.
For a new desktop build, the Media Creation Tool is often the most straightforward method.
It downloads Windows and prepares a bootable USB drive that the new PC can use to start Windows Setup.
You can also download the ISO separately and use a trusted utility to write it to a USB drive.
Tom's Hardware describes the ISO route as a way to create installation media for a fresh Windows installation, while PCWorld also distinguishes the download process from the later installation steps.
Prepare the desktop
Before downloading the installer, confirm the PC's motherboard firmware settings and hardware compatibility.
Windows 11 expects UEFI firmware, Secure Boot capability, TPM 2.0, and a supported processor.
On a custom built desktop, TPM may be available as a firmware feature even when there is no separate TPM module installed.
Consult the motherboard manual to identify the correct setting.
If the PC has multiple internal drives, identify which one will hold Windows.
Disconnecting secondary storage drives during a clean installation can reduce the risk of deleting files from the wrong disk.
This is particularly useful on a desktop with multiple SSDs or a combination of SSD and hard disk storage.
Reconnect the other drives after Windows Setup completes.
Download the installer
Use a working Windows PC to download the installation files.
Open Microsoft's Windows 11 download page and choose the Media Creation Tool if you want it to prepare a USB drive.
Choose the ISO option if you prefer to manage the image yourself or need it for a virtual machine.

ClickUp
ClickUp provides an all in one workspace with tasks docs automation and AI tools. This ClickUp review evaluates capabilities pricing fit and practical tradeoff…
- Extensive customization depth
- Strong free tier value
- Steep initial learning curve
- Interface can feel busy
The ISO download is a multi edition image, and the product key determines the edition that can be unlocked during installation.
For a blank desktop, the Installation Assistant is not the correct choice because it upgrades the Windows installation on the computer where it runs.
It does not create a general purpose bootable USB installer.
This distinction prevents a common mistake: downloading the assistant on a working PC and expecting it to prepare an installer for a different computer.
Install Windows on a blank PC
After creating the bootable USB drive, connect it to the desktop PC and power on the computer.
Open the motherboard's boot menu, select the USB device, and wait for Windows Setup to load.
The key used to open the boot menu varies by manufacturer and motherboard.
Common examples include F8, F11, F12, and Esc, but the correct key is listed in the motherboard or PC documentation.
When Setup starts, select the language, time, and keyboard preferences.
Continue to the installation screen and choose the appropriate Windows edition if prompted.
If the PC has a valid digital license associated with the hardware, the same edition may activate automatically after installation and an internet connection.
If it has no license, you can continue only where Setup provides the option to skip the key entry, but activation still requires a valid entitlement.
Choose the target drive carefully.
Deleting or formatting partitions removes the data stored on them.
If the desktop contains an existing operating system or personal files, stop and confirm the backup before removing partitions.
Once Windows copies the files and restarts, remove the USB drive when Setup instructs you or when the PC begins to restart from the internal drive.
Complete first time setup
After installation, connect the PC to the internet and complete the account and device setup prompts.
Run Windows Update to obtain available security updates and drivers.
Check Device Manager for unknown devices or missing drivers, particularly for network adapters, chipset components, audio, and graphics.
If the PC manufacturer provides a support utility, use it to confirm whether the system has current firmware and driver packages.
Then verify the Windows edition and activation status.
Open Settings, select System, and then Activation.
If Windows is not activated, confirm that the installed edition matches the license you own.
Do not enter random keys found on websites or use activation scripts from unknown publishers.
Those tools can compromise the installation and do not provide a legitimate license.
5. how to download windows 11 for free on usb
A bootable USB drive is one of the most useful ways to install Windows 11 on a new computer, reinstall it after a disk failure, or repair a system that cannot start normally.
A bootable USB is a flash drive prepared with Windows installation files and the boot information required for a PC to start the installer.
Copying an ISO file onto an ordinary USB drive does not, by itself, make that drive bootable.
Use a blank USB flash drive with at least 8 GB of capacity.
Microsoft warns that creating installation media deletes the existing contents of the selected drive, so copy any files you need before starting.
A larger drive can be convenient for other purposes, but the installer creation process will still erase the selected device.
Create USB media with Microsoft
The Media Creation Tool is the easiest route for most Windows users because it downloads the installation files and prepares the flash drive in one guided process.
The tool is intended for x64 PCs.
Microsoft provides separate installation images for Arm64 devices, so do not assume the standard Media Creation Tool will create the correct installer for every processor architecture.
- Insert a blank USB flash drive into a working Windows PC.
- Open Microsoft's official Windows 11 download page.
- Find the section for creating Windows 11 installation media.
- Download the Media Creation Tool.
- Open the tool and accept the license terms.
- Confirm the language and Windows edition, or select the appropriate options manually.
- Choose USB flash drive when asked which media to use.
- Select the correct USB device from the list.
- Confirm the selection and allow the tool to download and prepare the installer.
- Wait for the completion message before safely removing the USB drive.
Check the drive letter and device capacity before confirming the USB selection.
If more than one removable drive is connected, disconnect the ones you do not intend to erase.
The tool may display the USB by its label or capacity, so verify the device carefully.
Once the process completes, the flash drive is ready to use on a compatible PC.
Create USB media from an ISO
The ISO route is useful when you already have the Windows disk image or want more control over the installation media.
An ISO is a single file that contains the contents of an optical installation disc.
You can use a utility such as Rufus to write the image to a USB drive and make it bootable.
Download Rufus from its official publisher rather than from a software mirror, and check the selected drive before writing the image.
The general process is:
- Download the Windows 11 ISO for the correct processor architecture from Microsoft.
- Download a current release of Rufus from its official website.
- Insert the USB flash drive into the working PC.
- Open Rufus and confirm that the selected device is the intended USB drive.
- Select the Windows 11 ISO as the boot selection image.
- Review the partition scheme and target system options for the intended PC.
- Start the writing process and confirm that the USB contents can be erased.
- Wait for Rufus to finish and safely eject the drive.
Rufus offers options that can change the way Windows installation media is prepared.
Some settings are designed to bypass hardware checks or adjust the installation experience.
Those options do not change Microsoft's licensing requirements, and bypassing compatibility checks can leave the PC in an unsupported state.
For a normal installation, use the default settings unless you have a specific technical reason to change them.
Boot from the USB drive
Connect the USB drive to the target PC before switching it on.
If the computer opens Windows normally, restart it and use the manufacturer's boot menu key.
Select the USB device from the list.
Some firmware menus show the drive twice, once as a UEFI device and once as a legacy device.
For a modern Windows 11 installation, use the UEFI option where available.
If the USB drive does not appear, check whether the port works, try another USB port, and confirm that the media creation process completed successfully.
Some desktop systems behave differently when a flash drive is connected to a front panel port or USB hub.
Connecting the installer directly to a rear motherboard port can help eliminate those variables.
If the drive still does not appear, recreate the media and check the motherboard's boot configuration.
USB installation risks
The USB installer can erase data from the target computer if you choose to delete or format existing partitions.
It can also erase the flash drive itself during media creation.
These are two separate risks, and both deserve attention.
Keep the original backup separate from the installation drive, and never use the only copy of important files as the USB installer.
A bootable USB is also a useful recovery tool, but it is not a substitute for a full backup.
It can start Windows Setup and provide access to recovery tools, but it cannot restore documents or application data that have been permanently erased.
Keep a separate recovery plan for business systems, particularly computers that store accounting data, local databases, or operational records.
6. how to download windows 11 for free in pendrive
A pendrive is simply another name for a USB flash drive.
The installation process is therefore the same: download the official Windows 11 files and use the Media Creation Tool or an ISO writing utility to prepare the drive.
The important detail is that the pendrive must be prepared as bootable installation media.
A folder containing copied Windows files is not necessarily sufficient to start a computer.
Choose a reliable flash drive with at least 8 GB of capacity and check its condition before using it for an operating system installation.
Very old or damaged flash drives can fail during the writing process or produce installation errors.
If the drive contains files, back them up first because the media creation process will erase them.
Do not use a pendrive that contains the only copy of important documents.
Prepare the pendrive
The Microsoft Media Creation Tool can format and prepare the pendrive automatically.
This is generally easier than manually copying files or configuring boot sectors.
After the tool finishes, open File Explorer and confirm that the USB drive contains Windows installation folders and setup files.
Do not edit or delete those files before using the drive.
If you use Rufus, make sure the USB device selected in the application is the pendrive you intend to erase.
A computer with external hard drives, memory cards, and multiple USB drives attached can show several storage devices at once.
Check the capacity and device name before starting.
Selecting the wrong disk can cause data loss that is difficult or impossible to reverse.
Use the pendrive on another computer
After preparation, safely eject the pendrive and connect it to the target PC.
Open the boot menu and select the USB device.
The installation process is the same as it would be with any other bootable Windows 11 USB drive.
The pendrive does not need to remain connected after Windows has copied the installation files and the PC restarts from its internal storage.
For technicians who install Windows on several computers, a single pendrive can be reused to install the same Windows release on multiple compatible devices.
However, each installation still needs an appropriate license.
A single retail license cannot automatically be used to activate multiple computers at the same time.
Organizations should use the licensing agreement that applies to their deployment rather than treating the installer as a multi device license.
7. how to download windows 11 for free with product key
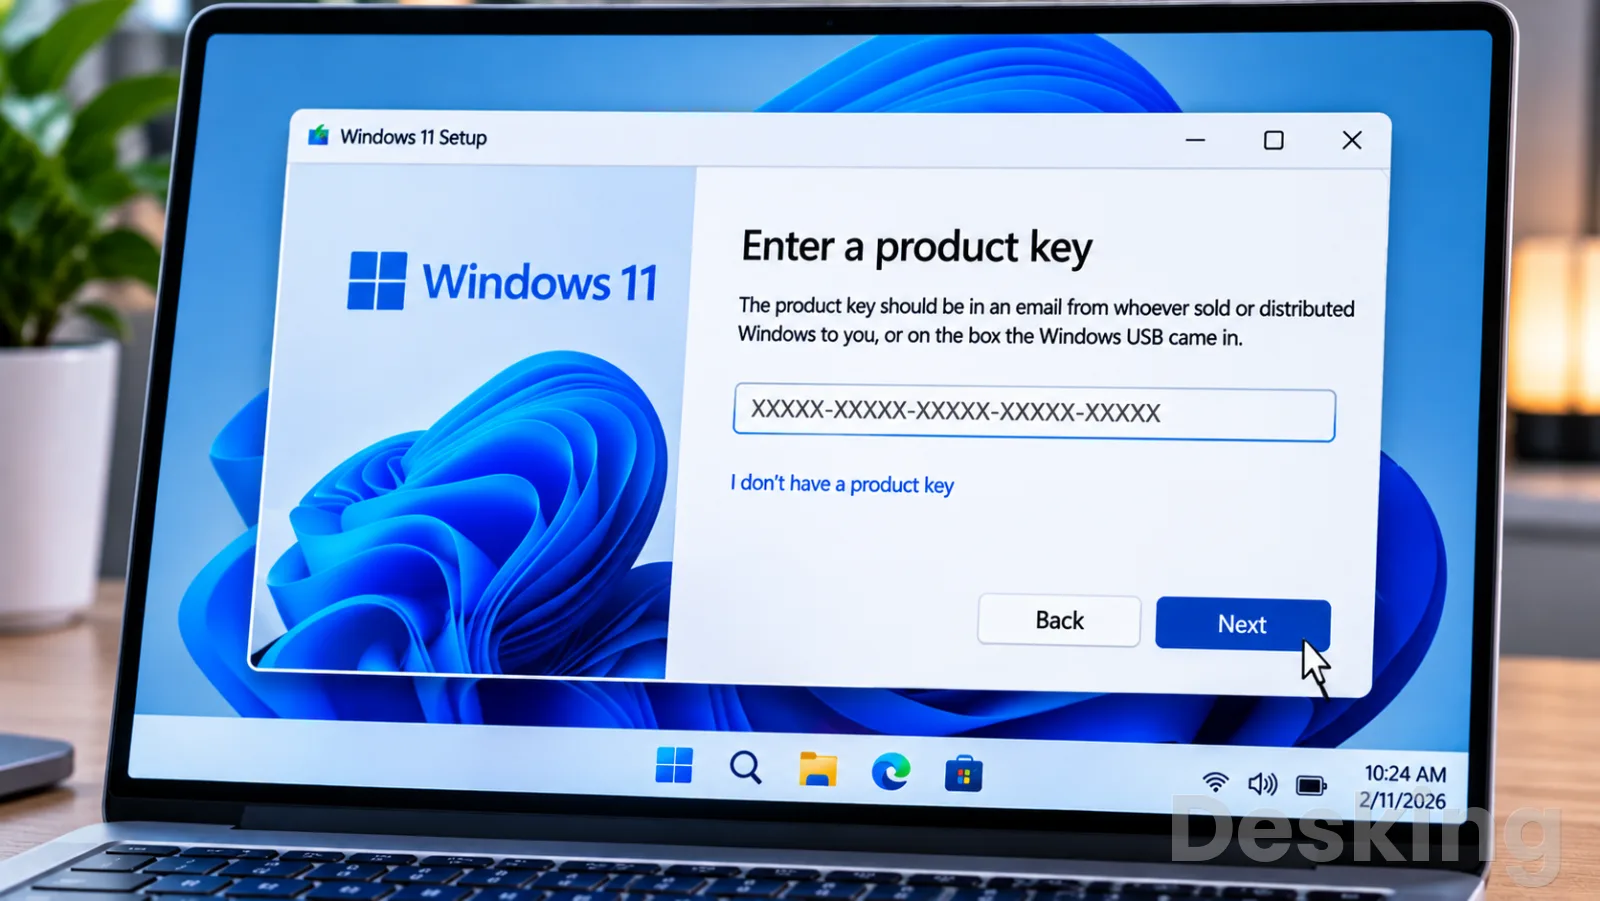
A Windows 11 product key is a 25 character code used to activate a specific Windows edition.
It is not normally required to download the installation files.
You can download the official ISO or create a USB installer first, then enter the key during installation or after Windows reaches the desktop.
The key must be valid for the edition you intend to activate.
A digital license is another activation method.
It is associated with the device's hardware and may also be linked to a Microsoft account.
If the computer already has a digital license for Windows 11 Home, for example, reinstalling the same edition may activate automatically after the device connects to the internet.
Microsoft states that a product key or digital license is required for activation.
Find your existing key
If Windows came preinstalled on a laptop or desktop, its license may be embedded in the device firmware or supplied through the original purchase arrangement.
Some older computers include a Certificate of Authenticity label or a product key card.
A separately purchased digital license may be recorded in the retailer's order confirmation or account.
Before reinstalling Windows, check the activation page and record the edition currently installed.
If you bought Windows separately, locate the original purchase email, packaging, or account record.
For a business device, the key may be managed through an organization's volume licensing or deployment arrangement.
Ask the administrator responsible for licensing rather than using a key found in an unrelated installation.
A product key should be treated as confidential licensing information.
Do not publish it in a support forum, share it in a screenshot, or send it to an unknown person who claims to provide activation assistance.
A legitimate support request rarely requires you to disclose the entire key in a public conversation.
If a technician needs to check activation, use the built in Windows settings and official support channels.
Download and install with a product key
The correct sequence is to download the installer, prepare the installation method, install the edition covered by the license, and activate Windows.
The product key does not need to be entered on Microsoft's public download page.
It is used during installation or through the Activation settings after installation.
- Confirm whether your license covers Windows 11 Home or Windows 11 Pro.
- Download the official Windows 11 ISO or create a bootable USB installer.
- Start Windows Setup on the target computer.
- Enter the product key when Setup asks for it, if you have it available.
- If the key is not available, select the option to continue without a key where Setup offers it.
- Choose the edition that matches your license.
- Complete installation and connect the computer to the internet.
- Open Settings, select System, and then Activation.
- If Windows is not activated, select the option to change the product key and enter the valid code.
Microsoft documents the use of a digital license and product key as separate activation routes.
It also explains that a reinstall can reactivate automatically when the device has a matching digital license and the user signs in with the Microsoft account associated with that entitlement.
The exact activation result depends on the license type, device, edition, and hardware changes.
Avoid invalid product keys
Websites that advertise extremely cheap Windows keys may be selling keys with unclear origins or restrictions.
A key can activate Windows at first and still be unsuitable for the way the license is being used.
Some keys originate from volume licensing, developer programs, educational arrangements, or geographic markets with different terms.
Activation success alone does not prove that the license was transferred or sold in accordance with its terms.
Be especially cautious with sellers that provide a key through a chat message, ask you to run an activation script, or instruct you to disable antivirus software.
A genuine Windows installer does not need a third party activation program.
Avoid KMS emulators, cracked activation tools, modified ISO files, and scripts that change Windows licensing components.
They can introduce malware, weaken system security, or leave the installation in an unstable state.
What happens if you have no key?
You may be able to install Windows without entering a product key if the Setup process offers the option to continue without one.
This is useful when reinstalling a computer with an existing digital license or when you plan to obtain a license after installation.
It does not mean that Windows has granted a new license at no cost.
After installation, check the activation page rather than assuming that the system is activated.
If activation fails, confirm that the correct edition is installed, that the computer has internet access, and that the license has not been used on another device in a way that conflicts with its terms.
If the hardware has changed significantly, the activation troubleshooter may help when the license is eligible for reactivation.
8. how to download windows 11 for free on mac
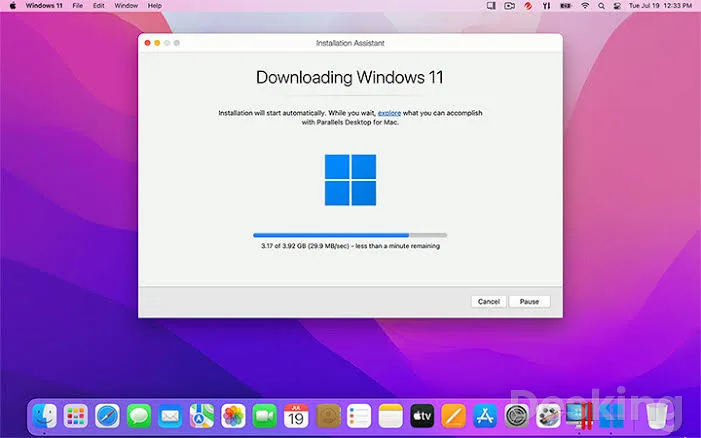
A Mac can run Windows 11, but the installation method depends on whether it has an Intel processor or an Apple silicon chip.
Intel based Macs and Apple silicon Macs use different processor architectures.
That affects the Windows image you need, the available installation methods, and the applications that can run inside Windows.
A standard x64 Windows installer is not interchangeable with an Arm64 image on every Mac.
On an Apple silicon Mac with an M series processor, Windows 11 normally runs in a virtual machine using Windows 11 Arm.
On an Intel Mac, virtualization is also possible, while Boot Camp may be available on supported older models.
Macworld explains that Apple silicon Macs cannot use Boot Camp to install Windows as a separate native boot environment, although virtualization software can run Windows alongside macOS.
Identify your Mac processor
Open the Apple menu and select About This Mac.
Check the processor or chip information displayed in the system window.
If it lists an Intel processor, the Mac uses the Intel architecture.
If it lists an Apple M series chip, the Mac uses Apple silicon and requires an Arm compatible Windows environment.
This check should come before downloading an ISO.
The x64 Windows 11 image is intended for compatible Intel and AMD PCs.
An Apple silicon Mac needs an Arm64 Windows image when setting up a virtual machine.
Microsoft provides separate Windows 11 ISO options for x64 and Arm64 devices.
Run Windows on Apple silicon
For an M series Mac, virtualization is the practical way to run Windows 11.
Virtualization software creates a virtual computer inside macOS.
Windows runs in that virtual machine, while macOS remains the host operating system.
You can switch between Windows and Mac applications without restarting the computer, although Windows receives only the CPU, memory, and storage resources allocated to the virtual machine.
Parallels Desktop is one option, while UTM provides another route for users who prefer a more manual setup.
Parallels can automate much of the Windows 11 Arm installation process, but its own software licensing is separate from the Windows license.
UTM can be used for a manual virtual machine setup, but you must select the correct Arm64 Windows image and configure the virtual hardware appropriately.
Macworld and independent Mac coverage describe the architecture distinction and the role of virtualization on Apple silicon.
A typical virtual machine installation follows this sequence:
- Open About This Mac and confirm that the computer has an Apple silicon chip.
- Choose a virtualization application that supports the macOS version and Windows 11 Arm.
- Download the virtualization application from its official publisher.
- Obtain the Windows 11 Arm64 installation image from Microsoft's official source or use the application's supported download process.
- Create a new virtual machine and select the Arm64 Windows installation image.
- Allocate an appropriate amount of memory and storage without leaving macOS short of resources.
- Start the virtual machine and follow Windows Setup.
- Complete the Windows first run configuration and install the virtual machine tools if required.
- Check Windows activation and enter a valid license for the edition installed.
The available memory and storage on the Mac affect the experience.
A virtual machine reserves resources for Windows while macOS continues to run.
If you allocate too much memory to Windows, the Mac may have fewer resources available for browser tabs, creative applications, and other work.
If you allocate too little, Windows applications may perform poorly.
Check the requirements of the applications you intend to run before choosing the virtual machine configuration.
Run Windows on an Intel Mac
Some Intel Macs support Boot Camp, which allows Windows to be installed on a separate partition and started directly when the computer boots.
Boot Camp support and Windows 11 compatibility are separate questions.
Apple's Boot Camp support for older Windows versions does not automatically mean that a particular Intel Mac officially supports Windows 11.
You must check the model, firmware, drivers, and Windows 11 hardware requirements before attempting an installation.
A virtual machine is another option on Intel Macs.
It allows Windows to run inside macOS without restarting the computer.
The virtual machine software must support the Mac's macOS version and the Windows edition you intend to install.
A standard x64 Windows 11 ISO is the relevant architecture for an Intel Mac, but the virtual machine still needs suitable virtual TPM and firmware support to satisfy Windows 11 installation requirements.
Understand the license on a Mac
Downloading Windows 11 Arm or x64 does not include a Windows license.
You may need a separate Windows license for the virtual machine, depending on the entitlement you already own and the terms that apply to it.
The cost of virtualization software, where applicable, is also separate.
A trial of a virtual machine application does not provide a permanent Windows license.
A virtual machine is treated as a Windows installation in its own right for licensing purposes.
If you already have a license, check whether its terms allow use on the Mac and whether it can be transferred from another computer.
Do not assume that a license installed on a physical PC can automatically activate a second Windows installation in a virtual machine.
Check application compatibility
Windows 11 Arm can run many applications built for Arm and can emulate many x86 and x64 applications.
However, compatibility is not universal.
Applications that depend on specialist drivers, low level hardware access, certain security components, or specific peripherals may not work correctly in a virtual machine.
This is particularly relevant for engineering utilities, older business applications, USB security devices, and software that uses specialized hardware.
Before committing to a virtual machine setup, check the software publisher's system requirements.
If the application needs direct access to a hardware device, confirm that the virtualization platform supports the device and the required connection method.
A successful Windows installation does not guarantee that every Windows program will behave exactly as it does on a physical PC.
9. how to download windows 11 for free without usb
You can install or upgrade Windows 11 without a USB drive if the computer already runs a supported version of Windows and can open the installation files.
The most practical method is to download the official ISO, mount it in File Explorer, and run Windows Setup from the mounted image.
Mounting an ISO creates a virtual DVD drive inside Windows, so you can access the installation files without writing them to a physical disc or flash drive.
This method is useful when you want to upgrade a working PC, do not have a spare USB drive, or need to avoid creating external installation media.
It is not a universal replacement for a bootable USB.
If the internal drive is blank or Windows cannot start, you generally need another bootable recovery or installation method.
Pureinfotech documents the ISO mounting method and the use of Setup to start an upgrade from an existing Windows installation.
Download the ISO file
Use Microsoft's official download page and choose the ISO option that matches the computer's processor architecture.
The ISO is a multi edition image, and the product key or existing digital license determines the edition that can be activated.
Save the file to a location with sufficient free storage, such as the Downloads folder or another internal drive.
Do not download an ISO from an unofficial file sharing site or use a modified image described as pre activated.
An operating system installation has access to personal files, stored credentials, and connected devices.
A modified ISO can include unwanted software or changes that are difficult to detect before installation.
Downloading directly from Microsoft reduces the risk of receiving an altered installation image.
Mount the ISO in File Explorer
Once the download is complete, locate the ISO file in File Explorer.
Right click the file and select Mount.
Windows creates a virtual DVD drive and displays it under This PC.
Open that drive and locate the Setup application.
Double click Setup to start the installation process from the mounted image.
If the Mount option is not visible, check that the file has an ISO extension and has finished downloading.
ClickUp
ClickUp provides an all in one workspace with tasks docs automation and AI tools. This ClickUp review evaluates capabilities pricing fit and practical tradeoff…
- Extensive customization depth
- Strong free tier value
- Steep initial learning curve
- Interface can feel busy
You can also right click the file, select Open with, and choose Windows Explorer if that option is available.
Do not extract the ISO with an archive utility and then delete files at random.
The Windows Setup application expects the original installation structure.
Start the upgrade
After Setup opens, follow the prompts and review the installation choices.
The installer may offer to download updates, drivers, and optional features during the process.
You can review the update choice before continuing.
If Setup offers to keep personal files and apps, confirm that this is the intended option before selecting Install.
A mounted ISO launched from inside Windows is generally an in place upgrade path.
It is not the same as starting the computer from a bootable USB and performing a clean installation.
The distinction matters because the clean installation process can remove files and applications from the target disk.
If your objective is to preserve installed programs, use the in place upgrade route and verify the retention choice before proceeding.
Install without USB on a blank PC
A PC with no working operating system cannot normally mount an ISO through File Explorer.
Mounting requires Windows to be running so that it can expose the image as a virtual drive.
If the computer has a blank drive or Windows cannot start, download the ISO on another computer and create bootable installation media, or use another supported recovery method.
Network based deployment and advanced recovery tools may provide alternatives in managed environments, but they require preparation and compatible infrastructure.
For a typical home user, a USB installer is usually the most practical route for a blank PC.
Avoid instructions that claim an ISO can simply be copied to an empty hard drive and started without a boot manager or installation environment.
Protect data during an ISO upgrade
Before starting Setup, make a backup and confirm that the laptop or desktop has enough free storage.
If BitLocker is enabled and you plan to perform a clean installation or change the disk configuration, review Microsoft's instructions for suspending protection and make sure you have the recovery key.
An unexpected recovery prompt can prevent access to the drive if the key is unavailable.
Keep the computer connected to power and avoid interrupting Setup during the restart sequence.
If the process fails, record the error code and check Microsoft's installation troubleshooting guidance before repeating the attempt.
Repeatedly launching Setup without resolving a driver, storage, or compatibility issue can waste time and may leave the system in an incomplete state.
10. how to download deep freeze for windows 11
Deep Freeze is a computer restoration application developed by Faronics.
It uses a method commonly described as reboot to restore: when a protected computer is in its Frozen state, changes made during that session are discarded after a restart.
When the computer is in its Thawed state, changes are retained.
This makes Deep Freeze useful in environments where many users share the same computers, such as training rooms, schools, libraries, public access workstations, and some business environments.
Deep Freeze is a separate product from Windows 11.
It does not download, install, activate, or replace Windows.
You install it after Windows is working, then configure the protection settings for the computer.
Faronics provides Deep Freeze Standard, Enterprise, Server, and Cloud options for different deployment requirements.
The company's current product information lists support for Windows 11 up to version 25H2 for Deep Freeze Standard, while its release information also describes newer Enterprise releases and Windows ARM support.
Check the exact product version and release notes before installing it on a newer Windows build.
Download Deep Freeze safely
Download Deep Freeze from Faronics or an authorized distributor.
The official Faronics download area provides evaluation downloads, and the company states that its evaluations expire after 30 days.
The available edition depends on the number of computers and whether central management is required.
Do not use repackaged installers from file sharing websites, because they may be outdated or modified.
The official download process is generally as follows:
- Open the Faronics website and locate the Deep Freeze product section.
- Select the edition that matches the intended deployment, such as Standard or Enterprise.
- Open the official download or evaluation page.
- Complete any registration details required for the evaluation.
- Download the installer provided by Faronics.
- Check the downloaded file and confirm that it comes from the official publisher.
- Review the product guide and system requirements before installation.
- Run the installer with an administrator account and follow the setup prompts.
- Complete the initial configuration and set an administrator password.
- Restart the computer when the installer requests it.
The evaluation period is not a permanent free license.
If you intend to keep Deep Freeze in use after the evaluation, review the applicable licensing terms and obtain the required license from Faronics or an authorized reseller.
The number of protected workstations and the management features differ between product editions.
Choose the right Deep Freeze edition
Deep Freeze Standard is intended for smaller deployments where administrators can manage and update computers individually.
Faronics describes it as suitable for one to ten computers.
Enterprise adds centralized management functions for larger workstation deployments, while Server is designed for server environments.
Deep Freeze Cloud provides cloud based management capabilities for organizations that want to manage protected computers through a web console.
| Edition | Intended use | Management approach |
|---|---|---|
| Deep Freeze Standard | Small deployments of 1 to 10 computers | Local administration |
| Deep Freeze Enterprise | Larger workstation deployments | Centralized administration |
| Deep Freeze Server | Server operating systems | Server protection |
| Deep Freeze Cloud | Distributed workstation environments | Cloud based management |
The correct edition depends on how many computers need protection and how updates will be controlled.
A single home PC may be suitable for Standard, while a school computer lab with many workstations may benefit from Enterprise or Cloud.
Do not select an edition solely because its installer is available.
Check the licensing terms, supported operating systems, and management features before deployment.
Check Windows 11 compatibility
Compatibility must be checked against the installed Deep Freeze version, not just the product name.
Faronics documentation lists Deep Freeze Standard support for Windows 11 up to version 25H2.
The company's release notes describe version 10.20 Enterprise as a newer release and include Windows ARM support.
These details matter because an older Deep Freeze installer may not support a newer Windows release or processor architecture.
Faronics also specifies that Deep Freeze requires 10 percent of the hard drive to remain free.
Check the available space before installation, particularly on computers with small system drives.
If the computer uses BitLocker, Core Isolation, Memory Integrity, or endpoint security software, check the relevant product documentation and compatibility notes for the Deep Freeze version you plan to install.
Understand Frozen and Thawed states
The Frozen state protects the selected system configuration.
Changes made during a user session, including downloaded files and installed applications, can be discarded when the computer restarts.
This is useful when a public workstation must return to a known configuration after each user.
It can also reduce the amount of manual cleanup required after temporary use.
The Thawed state allows changes to persist after a restart.
Administrators use it when they need to install software, apply updates, change system settings, or make other permanent modifications.
Faronics' Getting Started guide explains that the computer must be placed in the appropriate state before changes are made and that a restart is required when the state changes.
Getting Started
This behavior has an important consequence for everyday users: files saved to a protected location while the computer is Frozen may disappear after restart.
Before enabling protection, decide where users should save documents that need to remain available.
Use a separate data partition, network storage, a managed cloud location, or another supported storage arrangement.
Do not assume that Deep Freeze automatically backs up user files.
Install Deep Freeze after Windows
Install Windows 11 first, complete the initial setup, install the required drivers, and apply the Windows updates that are appropriate for the device.
Confirm that the system is stable before adding Deep Freeze.
This sequence reduces the risk of freezing an incomplete operating system installation or preserving a configuration that still needs essential updates.
Before installing Deep Freeze, close unnecessary applications and review the Faronics installation guide.
Make sure you have administrator credentials and a record of the configuration changes you intend to make.
After installation, the computer may restart and enter the configured protection state.
Set the administrator password and confirm that you can access the Deep Freeze controls before handing the computer to other users.
Plan updates carefully
A Frozen computer can discard changes made by Windows Update or an application installer when it restarts.
Administrators therefore need a maintenance process that places the computer in the appropriate Thawed state, applies updates, checks the result, and then returns the system to protection.
This should be scheduled rather than left to individual users.
For a group of computers, central management can make maintenance more consistent.
Administrators can coordinate software deployment, operating system updates, and restart schedules.
The exact capabilities depend on the Deep Freeze edition and version.
Test the update process on one representative workstation before applying it to every computer in a lab or office.
11. how to download windows 11 pro for free
Windows 11 Pro is available through the same general download process as Windows 11 Home.
Microsoft's ISO is a multi edition image, and the product key or digital license determines which edition can be installed and activated.
You do not need a separate Pro download file just to obtain the installation media.
However, downloading the installer does not provide a free Windows 11 Pro license.
Windows 11 Pro includes features intended for business and advanced users, such as BitLocker Drive Encryption, Remote Desktop hosting, and the ability to join a domain or Microsoft Entra ID.
These capabilities can be useful in managed workplaces, but they do not mean every user needs Pro.
Microsoft documents the Home to Pro upgrade route through the Microsoft Store or by entering a valid Pro product key.
Download the Windows 11 ISO
To obtain the official Windows 11 installation image, open Microsoft's download page and select the Windows 11 ISO option for the target device's architecture.
The standard x64 ISO is suitable for compatible Intel and AMD PCs.
An Arm64 device needs the corresponding Arm64 image.
The multi edition ISO contains the installation files for supported editions, with the product key determining which edition is unlocked.
If you are preparing a new PC, use the ISO to create a bootable USB drive.
If you are upgrading an existing Windows installation, you may be able to mount the ISO and start Setup from File Explorer.
The download process is the same whether you intend to install Home or Pro.
Edition selection and activation are handled during or after installation.
Install Windows 11 Pro with a valid key
If you already own a Windows 11 Pro product key, you can enter it during Setup when prompted.
If you skip the key entry, choose Windows 11 Pro when the installer asks which edition to install, where that choice is available.
After setup, open Settings, select System, and then Activation.
Use the Change product key option if Windows needs the key to activate.
The edition must match the license.
A Windows 11 Home license does not activate Windows 11 Pro.
If a device originally came with Home and you install Pro, you need an eligible Pro entitlement or must purchase the upgrade.
Microsoft recommends activating Windows Home before performing a manual edition upgrade.
Upgrade from Home to Pro
If Windows 11 Home is already installed and activated, you can upgrade the edition through the Microsoft Store.
Open Settings, select System, and then Activation.
Under the option to upgrade your edition of Windows, open the Store and follow the purchase instructions.
Windows will guide you through the upgrade and restart process.
If you already have a valid Windows 11 Pro product key, use the Change product key option in Activation settings instead.
Enter the 25 character key and follow the instructions.
Microsoft explains that this manual route applies to devices running an activated copy of Windows 11 Home.
If the current Home installation is not activated, resolve that activation issue first.
Can Windows 11 Pro be activated for free?
There are legitimate cases where you may already own a Pro license and do not need to pay again.
For example, a device may have an existing Pro digital license, or an organization may provide Windows through an eligible licensing agreement.
A user may also have a valid Pro key from a previous purchase that can be used on the intended device under the license terms.
There is no general public offer that gives every user a permanent Windows 11 Pro license simply for downloading the ISO.
Unofficial activation scripts, leaked volume keys, KMS emulators, and pre activated downloads are not legitimate substitutes.
They may expose the computer to malware and can create licensing or security problems.
Use an existing entitlement, an authorized purchase, or a valid organization license.
Home versus Pro
The right edition depends on the features you need and the way the computer is managed.
Home is suitable for many personal computers and everyday tasks.
Pro is more relevant when the device must join a business domain or Microsoft Entra ID, host Remote Desktop connections, or use the additional management and security capabilities included with the edition.
Do not pay for Pro simply because it sounds more advanced.
Check whether the applications and services you use require a Pro feature.
If your organization manages devices through a domain, uses specific security policies, or needs a supported Remote Desktop host, Pro may be appropriate.
If the PC is used for browsing, office applications, media, and general home tasks, Home may be sufficient.
12. Fix common download problems
Windows 11 downloads can fail because of unstable internet access, insufficient storage, incorrect architecture selection, browser interruptions, or problems with the target device.
The error message often points to the affected stage, so record it before trying another download.
Repeatedly downloading the same file without checking the cause can waste bandwidth and time.
The download stops
Check the internet connection and confirm that the computer has enough free storage.
If the download fails through a browser, try the official download page again after checking whether the browser blocked the file or interrupted the transfer.
Avoid download managers from unknown publishers.
If the ISO appears incomplete or cannot be mounted, delete the damaged copy and download a fresh one from Microsoft.
The USB drive is not detected
Try another USB port and connect the drive directly to the computer instead of through a hub.
Check File Explorer or Disk Management to see whether Windows detects the drive.
If the drive is visible but cannot be selected by the media creation tool, check its capacity and file system.
A damaged flash drive may need replacement rather than repeated formatting attempts.
The PC will not boot from USB
Open the firmware boot menu and confirm that the USB installer appears in the device list.
If it does not, recreate the installation media and check that the ISO architecture matches the target PC.
Review the UEFI and Secure Boot settings in the motherboard documentation.
Do not change multiple firmware options at random, because an incorrect setting can prevent the existing operating system from starting.
Windows Setup asks for a product key
Confirm whether the PC has an existing digital license and whether the edition selected in Setup matches that license.
If Setup offers the option to continue without a key, you can use it and check activation after installation.
If the device has never had a valid license, you will need to obtain one for activation.
A key for Home will not activate Pro.
Windows says the PC is unsupported
Check the exact compatibility reason.
TPM 2.0 or Secure Boot may be disabled in firmware, but the processor may also be unsupported.
A hardware requirement bypass does not make the device officially supported.
Microsoft warns that installing Windows 11 on hardware that does not meet the minimum requirements can lead to compatibility issues and may affect update eligibility.
The installation restarts repeatedly
Check whether the computer is booting from the USB drive again after the first restart.
If the USB installer remains first in the boot order, the computer may return to the initial Windows Setup screen instead of starting the new installation from the internal drive.
Remove the USB drive when appropriate or restore the internal drive as the first boot device.
Microsoft also notes that boot order changes may need to be reversed after installation.
13. Protect the installation
The Windows installer has extensive access to the computer, including storage devices and system configuration.
Downloading it from an unofficial site introduces avoidable risk.
A modified image may contain unwanted software, altered system files, or a hidden activation tool.
Those changes can be difficult to identify before installation, especially on a computer that stores work documents, passwords, or financial information.
Use Microsoft's official download service for Windows 11 ISO files and installation tools.
Avoid torrents, cracked ISO packages, repacked installers, and websites that promise permanent activation without a legitimate license.
If you are preparing installation media for an organization, use a controlled source and document the Windows edition, release, and licensing method used for each device.
Verify the installer
After downloading an ISO, use Microsoft's available verification guidance and check that the download completed successfully.
If you are managing many installations, record the image version and source used for the deployment.
This helps technicians reproduce the installation and identify whether two devices were prepared from different releases.
Do not rely on a filename alone to prove that an image is genuine.
Keep backups and recovery details
Store important data outside the system partition before performing a clean installation.
Keep the BitLocker recovery key accessible, record the device's edition and activation status, and confirm that essential drivers are available.
For business systems, also record application installers, network settings, certificates, and any device specific configuration that may be difficult to recreate.
Separate operating system and application protection
Windows activation, backups, endpoint security, and reboot to restore tools solve different problems.
A valid Windows license confirms the right to use the operating system under its license terms.
A backup protects data against loss.
Endpoint security helps detect or prevent malicious activity.
Deep Freeze restores a configured state after restart.
None of these functions replaces the others, and a secure deployment should account for each requirement separately.
14. Prepare for a clean installation
A clean installation is useful when a computer needs a fresh operating system, has serious software problems, or is being prepared for a new owner.
It removes the existing Windows installation from the selected partition and installs a new copy.
Depending on the choices made in Setup, personal files, applications, and settings may be deleted.
It should therefore be treated as a disk operation, not as a routine download.
Before starting, identify the computer's storage layout.
Open Disk Management in Windows and review the disks and partitions, or consult the manufacturer's documentation if the PC cannot start.
A modern Windows installation usually has several system partitions in addition to the main Windows partition.
Do not delete partitions simply because their names are unfamiliar.
Recovery, EFI, and system partitions may be required for the computer to boot or restore its factory configuration.
Record device information
Write down the PC model, processor, installed memory, storage capacity, network adapter, and Windows edition.
This information helps you obtain the correct drivers after installation.
On a laptop, the manufacturer's support page may provide a complete driver package for the exact model.
On a custom desktop, the motherboard manufacturer is usually the starting point for chipset, network, audio, and firmware information.
Record the applications that must be reinstalled and confirm that you have the necessary account credentials and license information.
Some applications store data locally or require deactivation on the old installation before they can be activated on the new one.
Business software may also depend on certificates, VPN configuration, mapped drives, or domain access.
A list made before installation is much more reliable than trying to remember every dependency after Windows has been erased.
Check encryption and recovery keys
BitLocker and device encryption can protect the contents of a Windows drive, but they can also complicate recovery if the encryption key is unavailable.
Before changing firmware settings, replacing hardware, or reinstalling Windows, confirm that you can retrieve the recovery key.
If the computer belongs to an organization, the key may be stored in the organization's management system or Microsoft Entra ID environment.
Do not assume that signing in with the same Microsoft account will always be enough to recover an encrypted drive.
The recovery key is a separate credential, and it may be required after a firmware update or hardware change.
Store it in a secure location that remains accessible if the laptop or desktop cannot start.
Decide between upgrade and clean install
An in place upgrade is appropriate when the existing Windows installation works and you want to preserve applications and personal data where Setup permits.
ClickUp
ClickUp provides an all in one workspace with tasks docs automation and AI tools. This ClickUp review evaluates capabilities pricing fit and practical tradeoff…
- Extensive customization depth
- Strong free tier value
- Steep initial learning curve
- Interface can feel busy
A clean installation is more suitable when you need to remove the existing operating system, prepare a blank drive, or resolve persistent problems that remain after normal repair.
The two processes use similar installation files, but they begin from different environments and have different consequences.
If the PC still starts normally and the goal is simply to move from Windows 10 to Windows 11, start with Windows Update or the Installation Assistant.
If the internal drive has been replaced or the computer has no operating system, create a bootable installer on another computer.
If the computer starts Windows but you need to reinstall from an ISO, mount the image and launch Setup from the running system.
Choose the method that matches the computer's current state rather than following a USB tutorial by default.
Complete the first restart correctly
During a clean installation from USB, Windows Setup copies files and restarts the computer.
After the first restart, the computer should continue from the internal drive rather than returning to the beginning of the installer.
If the USB remains connected and the firmware continues to boot from it, the installation menu may appear again.
Remove the USB at the appropriate point or select the internal Windows Boot Manager entry in the boot menu.
Once Windows reaches the desktop, leave the installation drive disconnected until you have confirmed that the operating system starts correctly from the internal storage.
Then run Windows Update, install missing drivers, and check activation.
If the computer is part of a managed business environment, reconnect it to the required network and management services only after confirming that the operating system and security controls are in the expected state.
15. What to do after installation
A successful installation is the start of the configuration process.
Windows may need security updates, device drivers, firmware updates, application installation, account configuration, and activation checks.
A new installation can also use generic drivers until Windows Update or the device manufacturer supplies the correct versions.
Check the system before returning it to normal work.
Run Windows Update
Open Settings and select Windows Update.
Check for available updates and install the relevant security and quality updates.
Restart when requested, then check again because some updates require another restart before additional updates appear.
Review optional driver updates carefully.
If the computer manufacturer provides a validated driver package, compare it with the version offered by Windows Update before changing a working configuration.
Windows release health is useful when preparing a large number of computers or installing a feature update shortly after release.
It provides information about known issues and compatibility holds.
For a business environment, test a new Windows release on a small number of representative devices before deploying it to every workstation.
This helps identify problems with printers, VPN clients, security software, line of business applications, and specialized peripherals.
Install manufacturer drivers
If Device Manager shows an unknown device or a device with a warning symbol, identify the hardware and obtain the appropriate driver.
Start with the laptop, desktop, or motherboard manufacturer's support page.
Avoid third party driver updater utilities that promise to install every missing driver automatically.
They can select an incorrect package or install software that the computer does not need.
For laptops, check the manufacturer's chipset, graphics, wireless, Bluetooth, touchpad, audio, and hotkey packages.
For desktop systems, check the motherboard chipset, Ethernet or Wi Fi adapter, audio controller, and graphics card.
If the PC uses a discrete graphics card, the graphics manufacturer may provide a newer driver than the computer manufacturer.
Use a stable release that supports the installed Windows version.
Confirm activation and edition
Open Settings, select System, and then Activation.
Confirm the installed edition and check whether Windows is activated.
If activation is pending, connect to the internet and allow Windows time to contact Microsoft's activation service.
If it still fails, confirm that the device has the correct license and that the installed edition matches it.
If the PC was previously activated and has a digital license, signing in with the associated Microsoft account may help with reactivation in eligible cases.
A major hardware change, particularly a motherboard replacement, can affect activation.
The Activation troubleshooter may help when the license permits reactivation.
If the device has never had a valid license, you will need to obtain one rather than relying on repeated activation attempts.
Reinstall essential applications
Install only the applications the user or organization needs.
Download installers from the software publisher or an authorized distribution channel.
For business computers, follow the organization's standard application deployment process.
Restore documents and application data from the backup only after confirming that the files are clean and belong to the correct user.
Check whether each application requires a new activation or account sign in.
Browsers may need profile synchronization, while email clients may need account configuration and local archive restoration.
VPN software, endpoint protection, accounting applications, and remote support tools may require administrator privileges or organization specific settings.
Record any installation that depends on a license server, certificate, or internal network resource.
Create a recovery point
After Windows, drivers, updates, and essential applications are installed, consider creating a system image or another recovery arrangement appropriate to the computer.
A system image can preserve the configured operating system and installed applications, while a file backup protects user data.
These are different forms of recovery and should be planned separately.
For managed workstations, a standard deployment image or provisioning process can reduce the time required to prepare replacement computers.
Deep Freeze may be suitable for shared workstations that need to return to a fixed state after every restart, but it should be configured only after the operating system and applications are fully updated.
Decide how user files will be stored before enabling Frozen mode.
Frequently Asked Questions
Can I download Windows 11 for free and use it forever?
Can I use a Windows 10 product key for Windows 11?
How much storage does a Windows 11 USB installer need?
Can I install Windows 11 on an old laptop?
Does Windows 11 Pro come with the Windows 11 ISO?
Can I run Windows 11 on a Mac without paying for Windows?
Is Deep Freeze free for Windows 11?
Sources6
- Faronics on Deep Freeze for Windows
- Microsoft on Windows 11 downloads
- OriginDL on Windows 11 ISO downloads
- Macworld on running Windows on Mac
- Pureinfotech on Windows 11 ISO installation
- PCWorld on Windows 11 downloads
External pages are independent third-party sources. Desking App does not control or endorse their content and accepts no responsibility for it. Visiting them is at your own responsibility and risk.