

How to create a web page using HTML with practical code examples
By Evander Thorne · November 19, 2026
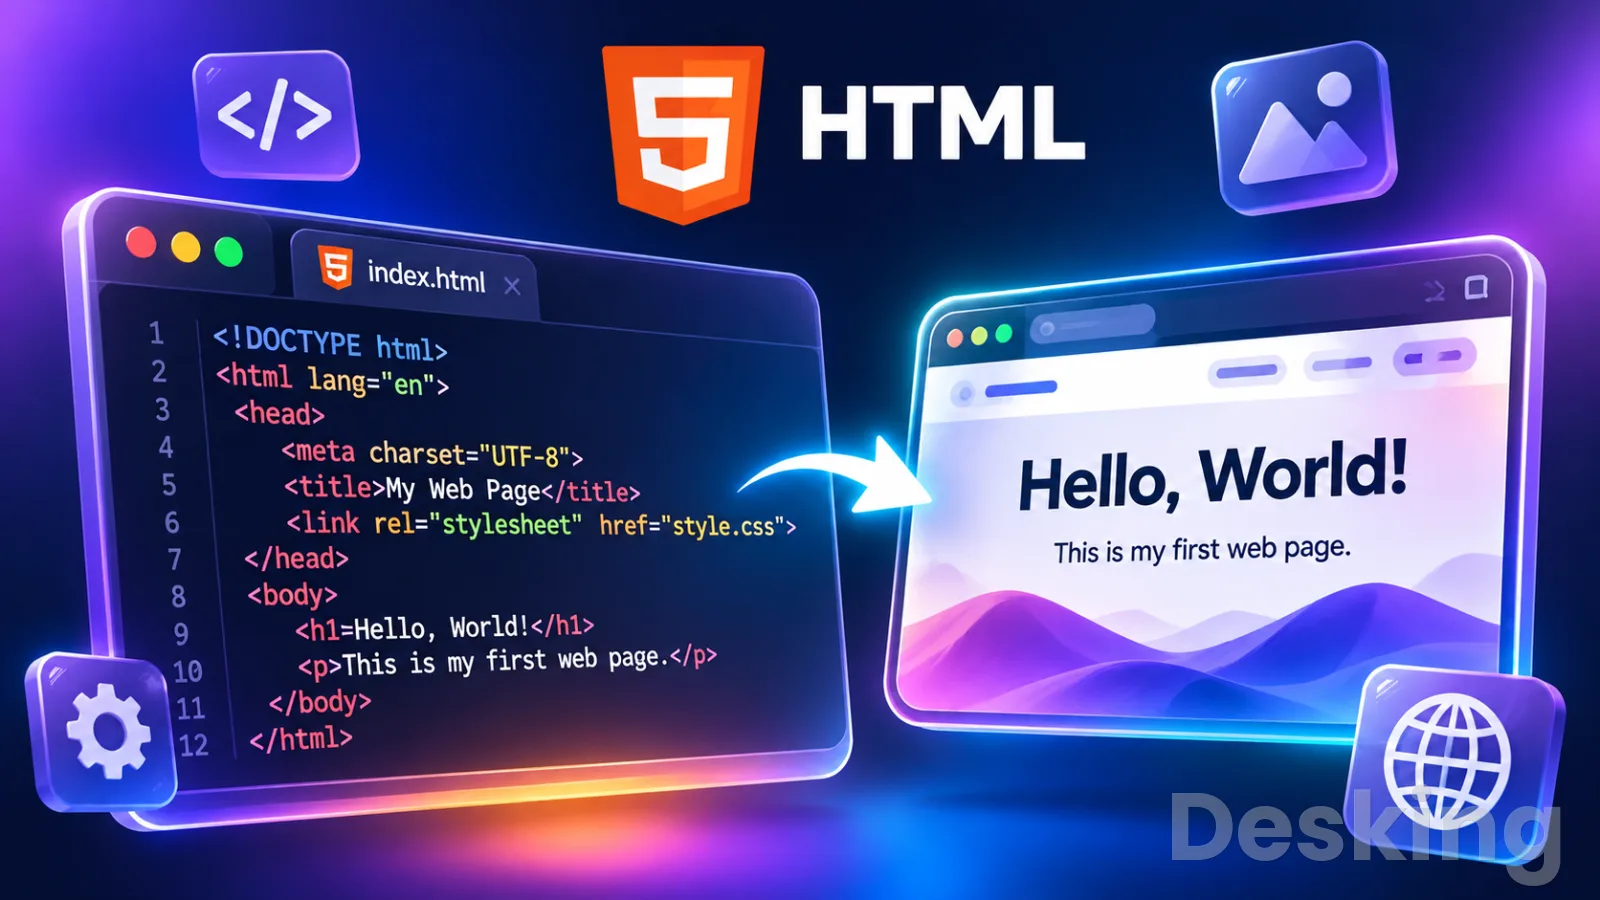
Table of contents
You can create a working web page with HTML using a basic text editor and a web browser.
You do not need a paid application, a web hosting account, or advanced programming knowledge to begin.
A simple HTML file saved on your computer can display headings, paragraphs, images, links, lists, and other content immediately.
I recommend starting with plain HTML before adding CSS and JavaScript.
This approach makes it easier to understand what each technology contributes and helps you identify mistakes when something does not appear correctly.
Once the first page works, you can improve its design, add navigation, make it responsive, and introduce interactive features.
1. Prepare your workspace
Before writing HTML, prepare a text editor, a web browser, and a folder for your website files.
HTML documents are plain text files, so a basic editor is sufficient for the first exercise.
You can use Windows Notepad, Visual Studio Code, Notepad++, or a Linux text editor such as Gedit or Kate.
I recommend keeping the first project simple.
Create one folder and store all the files for your website inside it.
This makes it easier to connect HTML, CSS, JavaScript, and image files as the project grows.
1.1 Choose an editor
A text editor allows you to write and save HTML code.
The browser reads the saved document and displays the page.
You do not need a compiler to create a basic HTML document.
Some suitable options include:
Windows Notepad: A basic editor already available on Windows.
Visual Studio Code: A free editor with syntax highlighting, code completion, and project folder support.
Notepad++: A lightweight editor with support for HTML, CSS, and JavaScript.
Gedit or Kate: Desktop text editors available on Linux systems.
Online editors: Browser based environments that let you write and preview code without installing software.
For a first lesson, Notepad is enough.
For a project with multiple files, I would choose Visual Studio Code because it makes it easier to manage the website structure and identify code errors.
1.2 Create a project folder
Create a folder named my-first-website on your desktop or in your Documents directory.
This folder will contain the HTML document and any additional files you create.
Inside the folder, you will eventually have a structure similar to this:
my-first-website/
│
├── index.html
├── style.css
├── script.js
│
└── images/
    └── website-photo.jpg
The index.html file contains the page structure.
The style.css file controls its appearance, while script.js contains JavaScript instructions.
The images folder stores photographs and graphics used by the page.
Keeping these files organized from the beginning prevents broken paths and makes future maintenance easier.
2. Understand basic HTML
HTML stands for HyperText Markup Language.
It is the standard markup language used to define the structure and meaning of content on web pages.
Browsers interpret HTML elements and use them to display headings, paragraphs, links, images, forms, and other page components.
The Mozilla Developer Network explains that HTML elements use tags to identify different parts of a document.
Most elements have an opening tag and a closing tag, with content between them.
Some elements, such as images, do not use a separate closing tag.
2.1 Understand HTML tags
An HTML tag tells the browser what type of content an element represents.
For example, the h1 element represents the main heading, while the p element represents a paragraph.

Deskbird
Deskbird helps hybrid teams coordinate office days, reserve desks and meeting rooms, and understand workplace occupancy through one connected platform.
- Intuitive desk booking interface
- Visual floor plan reservations
- Mobile experience needs refinement
- Advanced plans require custom pricing
Consider this small example:
<h1>My first website</h1>

<p>This is my first paragraph.</p>
The browser displays a large heading followed by a paragraph.
The angle brackets identify the HTML tags, while the text between the opening and closing tags becomes visible content.
2.2 Learn the document structure
Every standard HTML document should include a basic structure.
The document type declaration tells the browser to use modern HTML, while the html element contains the complete page.
The head element stores information about the document, including its title and metadata.
The body element contains the content that visitors see.
<!DOCTYPE html>
<html lang="en">
<head>
    <meta charset="UTF-8">
    <meta name="viewport" content="width=device-width, initial-scale=1.0">
    <title>My First Website</title>
</head>
<body>

    <h1>Welcome to my website</h1>
    <p>This is my first HTML page.</p>

</body>
</html>
The viewport setting helps the page adapt to mobile screen sizes.
The character encoding supports common text characters, and the title appears in the browser tab.
This is a suitable starting point for almost any basic HTML page.
3. Create a page using Notepad
Windows Notepad can create a complete HTML document because HTML is written as plain text.
You can type the markup, save the file with an .html extension, and open it in a browser.
This is one of the easiest ways to understand how a web page works without installing a development environment.
3.1 Open Windows Notepad
Open the Windows Start menu and search for Notepad.
Select the application and create a new blank document.
Do not use Microsoft Word for this exercise.
Word processors can introduce formatting that does not belong in a plain HTML file.
A text editor preserves the code as ordinary text.
3.2 Write your first HTML code
Copy the following example into the blank Notepad document:
<!DOCTYPE html>
<html lang="en">
<head>
    <meta charset="UTF-8">
    <meta name="viewport" content="width=device-width, initial-scale=1.0">
    <title>My First Web Page</title>
</head>
<body>

    <h1>Hello, world!</h1>

    <p>Welcome to my first web page.</p>

    <h2>About me</h2>

    <p>I am learning how to create websites using HTML.</p>

</body>
</html>
This document contains a title, a main heading, a secondary heading, and two paragraphs.
It is enough to produce a functioning page in a modern browser.
3.3 Save the HTML file
Select File, then Save As.
Choose the my-first-website folder you created earlier and enter index.html as the file name.
In the Save As window, set Save as type to All files and select UTF-8 encoding if the option is available.
This prevents Notepad from automatically adding the .txt extension.
A common beginner mistake is saving the document as index.html.txt.
That is a text file with an HTML-like name, not the intended HTML document.
Check the actual file extension before continuing.
3.4 Open the page in a browser
Open the folder where you saved the document.
Double click index.html, or right click the file and select Open with, followed by Chrome, Edge, or Firefox.
The browser should display the heading and paragraphs.
If you see the HTML tags as text, check whether the file was saved with the correct .html extension.
After changing the code in Notepad, save the file and refresh the browser.
The browser will load the updated version from your local computer.
4. Add CSS to your page
HTML defines the content and structure of a page.
CSS, or Cascading Style Sheets, controls its visual presentation.
It can change colors, fonts, spacing, borders, alignment, and page layouts.
I recommend adding CSS only after the HTML structure works.
This makes it easier to distinguish a structural problem from a design problem.
4.1 Add CSS inside HTML
You can write CSS directly inside an HTML document by using the style element in the head section.
<!DOCTYPE html>
<html lang="en">
<head>
    <meta charset="UTF-8">
    <meta name="viewport" content="width=device-width, initial-scale=1.0">
    <title>Styled Web Page</title>

    <style>
        body {
            background-color: #f4f4f4;
            font-family: Arial, sans-serif;
            margin: 40px;
        }

        h1 {
            color: #174ea6;
        }

        p {
            color: #333333;
            font-size: 18px;
        }
    </style>
</head>
<body>

    <h1>My First Styled Website</h1>
    <p>This page now has basic CSS styling.</p>

</body>
</html>
The browser applies the CSS rules when it displays the document.
The body receives a background color and font, the heading receives a blue color, and the paragraph uses a larger font size.
This method is useful for a small demonstration.
For a website with several pages, a separate CSS file is easier to maintain.
4.2 Create a separate CSS file
Inside your project folder, create a new file named style.css.
Open it in Notepad or your preferred code editor and enter the following:
body {
    background-color: #f4f4f4;
    font-family: Arial, sans-serif;
    margin: 0;
    padding: 30px;
}

h1 {
    color: #174ea6;
    text-align: center;
}

p {
    color: #333333;
    font-size: 18px;
    line-height: 1.6;
}
Save the file in the same folder as index.html.
Next, add the following line inside the HTML document's head element:
<link rel="stylesheet" href="style.css">The browser uses the href value to locate the stylesheet.
Both files must be in the same directory for this particular path to work.
4.3 Create a page with HTML and CSS
The following complete example combines a page structure with an external stylesheet.
It creates a simple landing page with a header, a main content area, and a button.
The HTML file:
<!DOCTYPE html>
<html lang="en">
<head>
    <meta charset="UTF-8">
    <meta name="viewport" content="width=device-width, initial-scale=1.0">
    <title>My Website</title>
    <link rel="stylesheet" href="style.css">
</head>
<body>

    <header>
        <h1>Welcome to My Website</h1>
        <p>A simple website built with HTML and CSS.</p>
    </header>

    <main>
        <h2>About this website</h2>
        <p>This is a beginner project to practise web development.</p>
        <a href="https://developer.mozilla.org/" class="button">
            Explore HTML resources
        </a>
    </main>

</body>
</html>
The CSS file:
body {
    margin: 0;
    font-family: Arial, sans-serif;
    background: #f4f6f8;
    color: #222;
}

header {
    background: #174ea6;
    color: white;
    text-align: center;
    padding: 50px 20px;
}

main {
    max-width: 800px;
    margin: 40px auto;
    padding: 25px;
    background: white;
    border-radius: 8px;
}

.button {
    display: inline-block;
    padding: 12px 20px;
    background: #174ea6;
    color: white;
    text-decoration: none;
    border-radius: 5px;
}

.button:hover {
    background: #103875;
}
Save both files in the same project folder and open index.html in your browser.
You should see a blue header, a white content panel, and a link styled as a button.
5. Add JavaScript functionality
JavaScript adds behavior to a web page.
It can respond to button clicks, validate form fields, update content, control menus, and communicate with web services.
A page can work perfectly well without JavaScript.
For a simple informational website, HTML and CSS may be enough.
However, when you want visitors to interact with the page, JavaScript becomes useful.
5.1 Create a JavaScript file
Create a new file in your project folder and name it script.js.
Add the following code:
function showMessage() {
    alert("Welcome to my website!");
}
This function displays a browser alert when it runs.
It does not execute automatically simply because the file exists.
The HTML page must load the JavaScript file and connect the function to an event.
5.2 Connect JavaScript to HTML
Add the following button to the body of your HTML document:
<button onclick="showMessage()">Click here</button>Then add this script reference near the end of the body:
<script src="script.js"></script>Deskbird
Deskbird helps hybrid teams coordinate office days, reserve desks and meeting rooms, and understand workplace occupancy through one connected platform.
- Intuitive desk booking interface
- Visual floor plan reservations
- Mobile experience needs refinement
- Advanced plans require custom pricing
When a visitor clicks the button, the browser runs the showMessage() function and displays the message.
For a larger project, prefer attaching event listeners in the JavaScript file rather than placing event attributes directly in HTML.
This keeps page structure and behavior separate.
5.3 Build an interactive example
This complete example combines HTML, CSS, and JavaScript.
It displays a button that changes a message when clicked.
<!DOCTYPE html>
<html lang="en">
<head>
    <meta charset="UTF-8">
    <meta name="viewport" content="width=device-width, initial-scale=1.0">
    <title>JavaScript Example</title>

    <style>
        body {
            font-family: Arial, sans-serif;
            text-align: center;
            padding: 60px 20px;
        }

        button {
            background: #174ea6;
            color: white;
            padding: 12px 24px;
            border: none;
            border-radius: 5px;
            cursor: pointer;
        }
    </style>
</head>
<body>

    <h1>My Interactive Page</h1>

    <p id="message">Click the button to change this message.</p>

    <button id="changeButton">Change message</button>

    <script>
        const button = document.getElementById("changeButton");
        const message = document.getElementById("message");

        button.addEventListener("click", function () {
            message.textContent = "You have successfully used JavaScript!";
        });
    </script>

</body>
</html>
Save the file as index.html and open it in a browser.
The initial message should appear beneath the heading.
When the visitor selects the button, JavaScript changes the paragraph without reloading the page.
6. Use Visual Studio Code
Visual Studio Code is a free source code editor suitable for HTML, CSS, and JavaScript projects.
It offers syntax highlighting, code completion, file navigation, and an integrated terminal.
Microsoft's documentation includes beginner exercises for creating a web page, adding CSS, introducing JavaScript, and inspecting the result with browser developer tools.
6.1 Create a project in VS Code
Open Visual Studio Code and select File, then Open Folder.
Choose your my-first-website folder.
The Explorer panel on the left displays the files in the project.
Select the New File icon and create index.html, style.css, and script.js.
This arrangement keeps the three technologies in separate files.
It also makes it easier to identify which file controls a particular part of the website.
6.2 Write HTML in VS Code
Open index.html and enter the basic HTML document structure.
VS Code supports HTML syntax highlighting, which makes tags and attributes easier to distinguish.
You can also type ! in an empty HTML file and use the editor's Emmet abbreviation expansion to generate a basic document structure.
Check the generated content before adding your own page elements.
6.3 Connect CSS and JavaScript
Add the stylesheet reference inside the head element:
<link rel="stylesheet" href="style.css">Add the JavaScript reference before the closing body tag:
<script src="script.js"></script>Save the files and open the HTML page in a browser.
If you install a local preview extension, you can use its preview or server command to refresh the page during development.
The extension is optional; a browser can open a local HTML file without it.
7. Create HTML on Linux
Linux users can create HTML pages with graphical text editors or terminal based editors.
The process is essentially the same as on Windows: create a text file, write HTML, save it with the .html extension, and open it in a browser.
Common desktop editors include Gedit, GNOME Text Editor, Kate, and Visual Studio Code.
For command line work, Nano and Vim are also suitable.
7.1 Create an HTML file with a graphical editor
Open your preferred text editor, create a new document, and enter the basic HTML structure.
Save the document as index.html inside your project directory.
Open a browser and use its file opening option to locate the document.
You can also open the file from the Linux file manager.
7.2 Create an HTML file using Nano
Nano is a terminal based text editor available on many Linux distributions.
Open a terminal and move to the directory where you want to store your website.
For example:
mkdir my-first-website
cd my-first-website
nano index.html
Enter the following HTML:
<!DOCTYPE html>
<html lang="en">
<head>
    <meta charset="UTF-8">
    <title>Linux HTML Page</title>
</head>
<body>
    <h1>Hello from Linux</h1>
    <p>This page was created using Nano.</p>
</body>
</html>
Press Ctrl and O to save the file, confirm the file name, and press Enter.
Then press Ctrl and X to close Nano.
7.3 Open the page in a browser
If Firefox is installed, you can open the file from the terminal with:
firefox index.htmlDepending on your Linux distribution and installed browser, the command may differ.
You can also open the file through the graphical file manager.
If the browser does not display the expected content, confirm that the file exists and that its name ends in .html.
Check the terminal output if the browser command returns an error.
8. Create a web page on mobile
You can write HTML on an Android phone or an iPhone.
A mobile device needs a text or code editor to create the document and a browser to display it.
The main limitation is screen size and file management.
Editing a large project on a phone can be less comfortable than using a computer, particularly when several files need to work together.
8.1 Create HTML on Android
Install a text editor or code editor that supports plain text files.
Create a new document, enter the HTML code, and save it with an .html extension.
Use the file manager to locate the document and choose a browser to open it.
If the browser displays the source code instead of the page, check the file extension and the editor's save location.
For projects with separate CSS, JavaScript, and image files, keep the files together in the same project folder.
Some mobile editors use their own private storage, so check whether the application supports exporting the complete project.
8.2 Create HTML on iPhone
On an iPhone, use a text editor that supports saving plain text files.
Create the HTML document, save it to the Files app or another accessible location, and use a suitable preview method to inspect the page.
The built in file preview is not a complete development environment.
Some local pages that depend on scripts, external files, or browser APIs may not behave as they would on a hosted website.
For serious work, use a browser based coding environment or transfer the project to a computer.
8.3 Use an online HTML editor
An online editor can be useful when you do not want to install an application.
Services such as CodePen and JSFiddle let you enter HTML, CSS, and JavaScript in separate panels and view the result in a browser.
This can be especially useful on a tablet or phone.
However, save a copy of your work outside the online editor when you need a local project or want to move it to another development environment.
9. Practise with beginner projects
The best way to learn HTML is to build small pages and change the code yourself.
Each exercise should introduce a limited number of new elements so that you can understand the result.
I would start with static content, then add links and images, and finally introduce styling and JavaScript.
This progression gives beginners a clear way to build confidence.
9.1 Build a personal profile
Create a page with your name, a short introduction, and a list of interests.
Use an h1 element for the main heading, paragraphs for the introduction, and an unordered list for the interests.
<!DOCTYPE html>
<html lang="en">
<head>
    <meta charset="UTF-8">
    <title>My Profile</title>
</head>
<body>

    <h1>My Profile</h1>

    <p>Hello!

My name is Alex.</p>

    <h2>My interests</h2>

    <ul>
        <li>Technology</li>
        <li>Web development</li>
        <li>Reading</li>
    </ul>

</body>
</html>
Change the name and list items to your own content.
Add another heading and paragraph to practise the document structure.
9.2 Add links and images
HTML supports hyperlinks through the a element and images through the img element.
A link uses the href attribute to identify its destination, while an image uses the src attribute to identify the image file.
<h2>Useful website</h2>

<a href="https://developer.mozilla.org/">
    Visit MDN Web Docs
</a>

<h2>My image</h2>

<img src="images/photo.jpg" alt="A description of the image" width="400">Place the image inside the images folder and use the correct file name.
The alt attribute provides alternative text for users who cannot see the image and for situations where the image does not load.
9.3 Create a contact form
HTML forms allow visitors to enter information.
A basic form can include text fields, an email field, and a submit button.
Deskbird
Deskbird helps hybrid teams coordinate office days, reserve desks and meeting rooms, and understand workplace occupancy through one connected platform.
- Intuitive desk booking interface
- Visual floor plan reservations
- Mobile experience needs refinement
- Advanced plans require custom pricing
<form>
    <label for="name">Your name:</label>
    <input type="text" id="name" name="name" required>

    <label for="email">Your email:</label>
    <input type="email" id="email" name="email" required>

    <button type="submit">Send</button>
</form>
This creates the form interface, but it does not automatically send information to an email address or save it in a database.
A working submission process needs a server side endpoint or a suitable form service.
This distinction matters because HTML alone cannot process and store submissions on a server.
9.4 Make the page responsive
A responsive page adjusts its layout to different screen sizes.
The viewport metadata and CSS media queries help the browser display content appropriately on phones, tablets, and desktop screens.
Add this metadata inside the head element:
<meta name="viewport" content="width=device-width, initial-scale=1.0">
Then add a simple media query to your stylesheet:
.container {
    width: 80%;
    margin: 0 auto;
}

@media (max-width: 600px) {
    .container {
        width: 95%;
    }
}
The container uses a narrower width on larger screens and more of the available screen width on smaller devices.
Test the page at different viewport sizes rather than assuming that a desktop layout will work on mobile.
10. Fix common HTML problems
A page may fail to display correctly because of a file extension, a missing stylesheet, an incorrect image path, or a mistake in the markup.
Beginners should check these issues before rewriting the entire document.
10.1 HTML code appears in the browser
If the browser displays tags such as html, head, and body as visible text, the file may have been saved with the wrong extension or opened as a plain text document.
Check the complete file name in the file manager.
On Windows, enable file name extensions in File Explorer so that you can see whether the file is actually named index.html.txt.
10.2 CSS changes do not appear
If the page loads but does not show the expected styling, check the stylesheet reference in the HTML document.
Confirm that style.css is in the correct folder and that the file name uses the same capitalization.
Also save the CSS file and refresh the browser.
A browser cache can sometimes make an older version appear, so a hard refresh may help during development.
10.3 Images are missing
An image will not appear if the path in the src attribute does not point to the correct file.
Confirm the image name, extension, and folder location.
For example, if the image is stored in an images directory beside index.html, the path should refer to images/photo.jpg.
A path that points to a file that does not exist will produce a broken image.
10.4 JavaScript does not run
Check that the script file exists and that the src value points to the correct location.
Open the browser developer tools and inspect the Console for errors.
If the script tries to select an HTML element before that element exists in the document, the code may fail.
Placing the script near the end of the body or using the defer attribute on an external script can prevent this timing issue.
Frequently Asked Questions
Can I create a website with HTML only?
Do I need internet access to write HTML?
Can I publish my HTML page for free?
Is HTML difficult for beginners?
Can I create a web page without Visual Studio Code?
How long does it take to create a basic HTML page?
Sources5
- YH Mobile on editing HTML on Android
- Visual Studio Code on editor tutorials
- Microsoft on web development training
- Brown University on HTML development setup
- MDN on basic HTML syntax
External pages are independent third-party sources. Desking App does not control or endorse their content and accepts no responsibility for it. Visiting them is at your own responsibility and risk.